Wood Staining
Wood Staining & Restoration in Tarpon Springs
This door's condition had deteriorated over the course of many years. Sun and water damage along with varying levels of mildew can be difficult to overcome once the original coating has been worn down.

Before appearance.
It was first removed from it's hinges and then arranged on a set of sawhorses in order to facilitate proper prep. Several towels were used as pads to protect the reverse side from damage during this process.


Restoration work varies and each particular case is different. The current condition of a potential project and the client's overall desired outcome are key elements in determining how to proceed.
Creating a pleasing appearance without knowing what the door looked like in it's original condition involved some subjective decision making from those participating in the restoration process. Moving closer to a brown result with hints of red added in here and there was ultimately chosen in favor over the more orange-like look this door initially presented once it had been stripped entirely.


At this stage of the process the coloring work has been completed and we can proceed on to to spraying a protective clear coat on it.
As the clear coat work begins, the varied coloration of this door's wood grain can truly be seen, especially in the two bead board type insert areas.


Proper masking of handles, peripheral hardware, adjacent wall areas, brick pavers on down the line are all necessary when doing this type work.
This door's transformation is nearly complete as the clear work wraps up. Going forward it will require routine periodic maintenance coats. Without those, Mother Nature and Florida's severe weather conditions will eventually overpower the restoration efforts.


Not rushing the removal of all the surrounding masking material is critical and will save many people involved in restoration work a major league headache.
Finished Result

Restored appearance. Gloss sheen.
Wood Staining & Restoration in Trinity
After discussing things with the homeowner here a decision was made not to dismount them for transport offsite for stripping and rebuilding of the finish. In the first photo below we are getting ready to "wash" these old doors as a first step in preparation for bringing them back to life.

We have made very good use of donated towels, sheets and other linens over the years, as seen in this entry opening.
Many different appearance issues have occurred over the course of time in the forty years since these were originally installed. There is also an interesting contrast between these two doors with regard to their respective grain patterns.


Refinishing stain & varnish issues is an art form. At times, this often requires trial and error along the way.
In this photo taken from a bench nearby, both doors are already showing some marked improvement in their appearance after the prep process despite the extreme viewing angle. The warmth of the old look is coming back.

Box fans come in handy for many things in the painting industry including cooling off the contractor on warmer days.
Finished Photo
A clear satin finish was applied after all the restoration work was completed.

An excellent result overall considering they were done in position.
Wood Staining in East Lake
Two photos are provided here as a good before and after illustration of what new windows looked like once they were put in and again after the finishing work was completed. Stain color is English Chesnut. Satin sheen for the varnish.


Stain & Varnish finishing work will usually happen early on in the overall sequence of work in most cases. The clear coat acts as a barrier for any specs of paint or mud that may arise from the surrounding walls and trim work that typically follow it.
Wood Staining in Trinity
A beautiful bench waiting to get transported to it's new home. The original slats didn't survive the strain of this project's overall goals and a decision was made that they be discarded due to excessive weathering issues over time. New ones were purchased, cut to size, drilled and confirmed for fit. These were then stained to the color and appearance seen here. Our part in this project was more of an informal behind the scenes consulting and troubleshooting role, as we did not participate in the actual finishing work, but felt we must salute the great looking outcome nonetheless.

This is what results can look like when someone puts in the effort and is not in a hurry.
Wood Staining in East Lake
This overall project was a lengthy one that involved the octagonal windows seen here, three sets of sliding glass doors on the first floor of the home and a number of more traditional rectangular shaped windows. All were installed in the unfinished condition seen in the first photo below and taken from there through the finishing process. Stain color is English Chestnut. Satin sheen.
Before


Learning to prep various different projects provides a never ending learning experience.
After

Producing gorgeous results like this octagonal window and the surrounding wall areas never gets old as a contractor.

Another window in a different bath from this home.
Wood Staining in Trinity
An Evolution in Pictures.

The homeowner's here have laid out there "homework" on this new bar top as part of the process of determining a stain color choice.


The written tape helpers are important reminders!
On their way to get stained.


The stain color chosen was a black, which was then modified into an overall look that best showed off this bar top's crazy quilt grain patterns. For more on the door seen here and a full set of pics on the cabinet aspect of the work, visit that photo series on our cabinet painting page.
Finished Photo
A backsplash will soon be added and the floating shelved will get installed.
Stain Matching in New Port Richey
We were asked to create a similar appearance for new wood trim to that of existing stained wood for a Pinellas County client. The age of the prior stain work is about forty-five years old and is very likely original to when the home was built. A 3 foot section was provided to obtain a reasonable match. Also being done was a single new flat pocket door. In the first two photos below we've begun checking various color samples and potential material types as we work on the stain match.


In the photo below, the new door's surface is shown after a few color coats of tinted material have been sprayed on. Final finishing on site will involve sanding the door followed by a satin varnish.

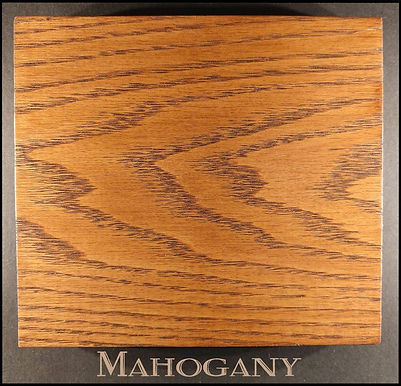
The sample pieces below were created using oak.
Available varnish sheens vary and include flat, matte, low sheen and on up through gloss.
Sample 1

Sample 2

Sample 3
Sample 4


Sample 6

Sample 5

Sample 7
Sample 8


Sample 9
Sample 10

Serving Trinity, Starkey Ranch, New Port Richey and the surrounding communities. Call (727)271-8165 for all of your wood staining project inquiries. Countryside Decorating is focused on creating excellent results for brand new wood trim staining and restoring older previously stained wood. Project costs vary based on wood condition and overall desired outcome. Several before, during and after photos below display the process taking place for entry doors, bar tops, shelving and window trim.
Wood Staining in Safety Harbor
These windows were installed in an office where the walls were finished already. With that in mind the vast majority of the surrounding wall areas were masked off to protect them from flying stain. The stain color here was custom matched to existing wood from another area of the office.

Getting set up requires a lot of peripheral area protection, especially for solvent based materials.


There were a very large number of hand smudges and dirt from the installation process.
All of these must be eliminated prior to beginning the actual staining work itself.

A great deal of labor went into the finished product seen in the above photo.